
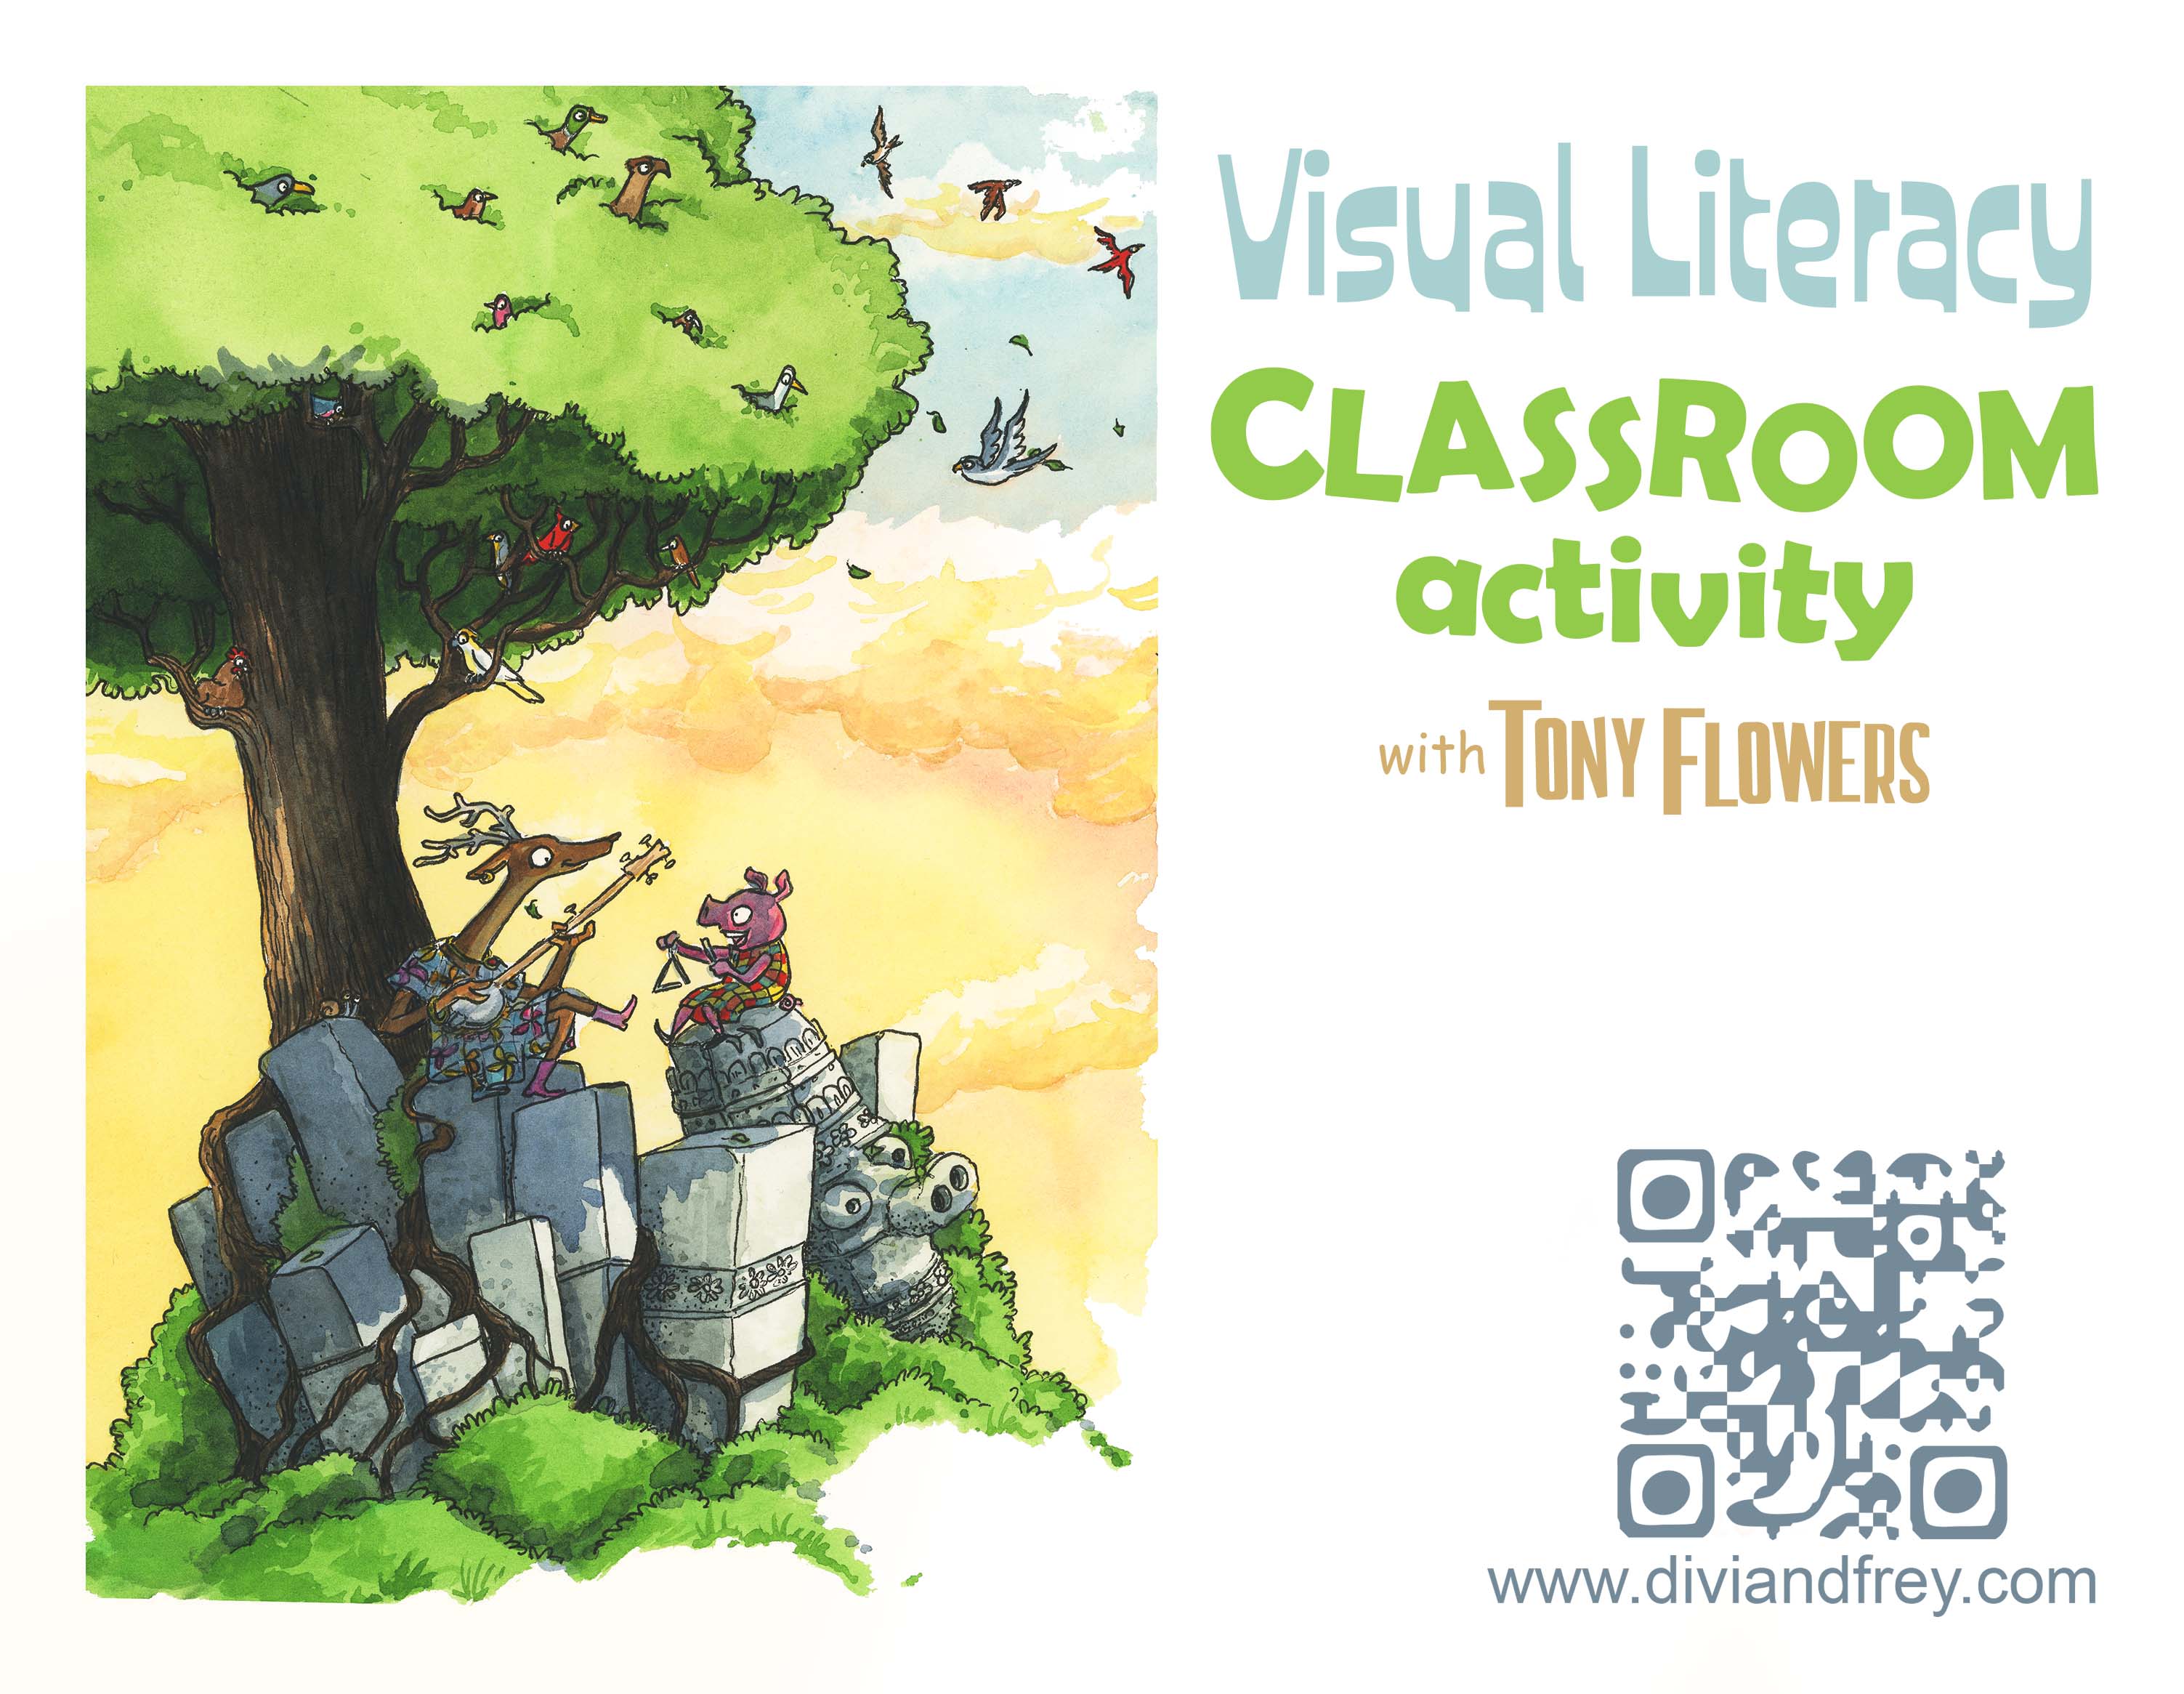
These post is made up of four lessons that were originally created as the opening module of an online short course on visual literacy for teachers, a project I began developing but ultimately decided to share here instead. Rather than keeping them tucked away, I wanted to make the material freely available so that any teacher, anywhere, can benefit from the ideas, strategies, and classroom applications they contain. If you’re a teacher and you find these lessons useful, I’d genuinely love to hear from you.
I’m also very happy to talk with teachers or teacher networks in person (face to face or via zoom). I you are interested in a presentation, a practical workshop, or a deeper dive into visual literacy and multimodal teaching, feel free to reach out and we can explore what that might make this happen.
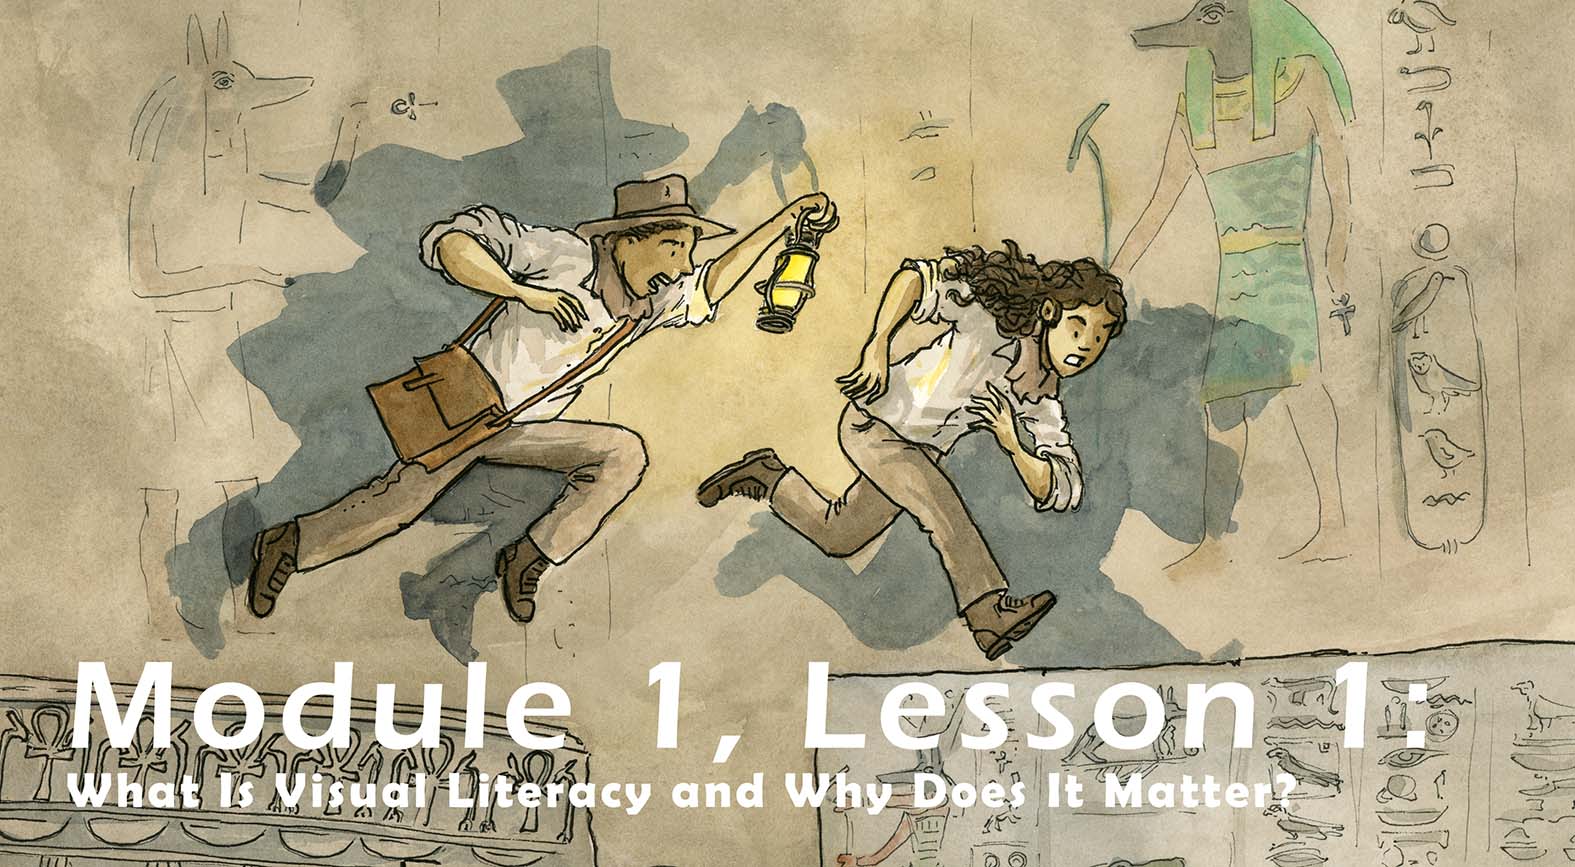
Welcome to Lesson 1 of Module 1! Today we lay the foundation for your journey into visual literacy, an essential skill for 21st-century learners and a powerful tool for every teacher.
Why This Matters
Visual literacy is more than just “looking at pictures.” It gives us the ability to understand, interpret, and create meaning using images. In today’s media-rich world, students are constantly engaging with visual texts, from picture books and graphic novels to infographics, diagrams, advertising, and social media. Yet many students lack the explicit skills to decode these visuals critically, creatively, and confidently.
When teachers understand visual literacy, they can help students become thoughtful interpreters, empathetic readers, and articulate communicators. Embedding visual literacy into everyday teaching supports comprehension, fosters deeper engagement, and empowers students to express themselves in multimodal ways.
What Is Visual Literacy?
The simplest definition of visual literacy is ‘the skill of reading and interpreting images. This allows us read images in narrative and interpret messages in combination with words. It includes understanding:
- Composition and layout
- Colour and symbolism
- Facial expressions and body language
- Sequencing and narrative flow
Curriculum Alignment (Australian Curriculum)
Visual literacy is a key component of the Australian Curriculum, supporting students to interpret, create, and communicate meaning through visual texts across all learning areas. It fosters critical thinking, multimodal comprehension, and creative expression from early years through secondary education.
Example of how Visual literacy is supported across multiple learning areas:
- English (Year 3 – ACELA1483):
Students learn to understand how visual elements create meaning in texts. - English (Year 6 – ACELY1690):
Students analyse and explain how visual elements contribute to meaning. - English (Year 7 – ACELY1701):
Students plan and deliver multimodal presentations using visual aids. - Science (Year 5 – ACSIS086):
Students communicate ideas using representations, including visual formats. - HASS (Year 6 – ACHHK094):
Students interpret historical sources, including photographs and other visual texts. - Media Arts (Years 5–6 – ACAMAM060):
Students explore how representations and meaning are constructed in media artworks.
Book study
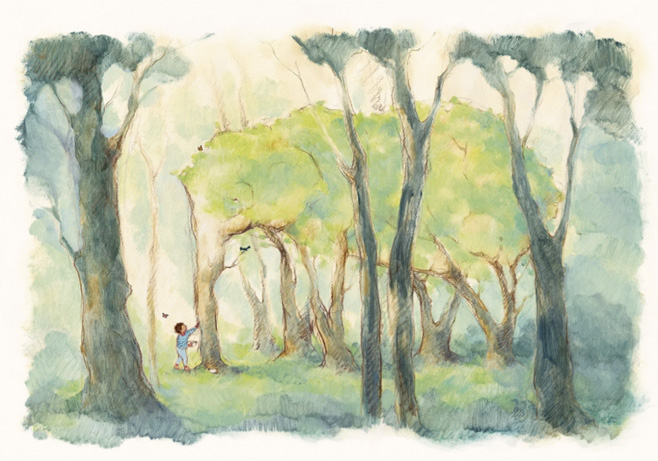
The Boy and the Elephant illustration (2024) Freya Blackwood
The Boy and the Elephant
The Boy and the Elephant by Freya Blackwood (HarperCollins Children’s Books)
This whimsical and emotionally resonant picture book invites children to explore imagination, empathy, and environmental awareness. A young boy discovers that the trees on the vacant block next door, his cherished play space, are about to be cut down. But in his eyes, they’re not just trees.
Visual Literacy Focus:
Freya Blackwood’s illustrations cleverly depict the trees with animal-like features—trunks shaped like elephants, branches resembling antlers, encouraging students to interpret symbolism, metaphor, and emotional tone. These visual choices prompt readers to consider how images can communicate deeper meanings beyond the literal.
Discussion Prompts to Build Visual Literacy:
- Was the boy’s plan a good idea? Why or why not?
- Who benefited from his actions, and how is that shown visually?
- What clues in the illustrations suggest how the boy feels about the trees?
- What would you do in his place? How could you show that in a drawing?
This story is a rich resource for teaching visual inference, symbolism, and narrative flow, all key components of visual literacy. The above prompts will help create deeper engagement, stronger comprehension, and more thoughtful classroom discussions.
Freya’s website post about this book: https://www.freyablackwood.com.au/the-boy-and-the-elephant-1
Visual literacy empowers students to make meaning from images, just like they do with text. It’s a vital skill for reading, writing, thinking, and communicating in contemporary classrooms.
(Standards: 2.5, 3.2)
Key Takeaways
- Visual literacy is about interpreting and creating images.
- It supports comprehension, empathy, and critical thinking.
- It belongs in every classroom, not just art.
Standards Touched on in This Lesson
| Code | Summary |
| 1.1 | Use strategies based on students’ physical, social, and intellectual development |
| 1.2 | Structure teaching programs using research into how students learn |
| 2.1 | Apply content knowledge and teaching strategies to develop engaging activities |
| 2.5 | Apply effective literacy strategies across learning areas |
| 3.1 | Set explicit, challenging learning goals for all students |
| 3.2 | Plan well-structured learning programs |
| 3.3 | Use teaching strategies that foster critical and creative thinking |
| 3.5 | Use effective communication strategies to support student engagement |
Learning Activity
Prompt: Choose a picture book, comic, or illustrated page you’ve used in class.
Write down three things’ students could learn by analysing the visuals:
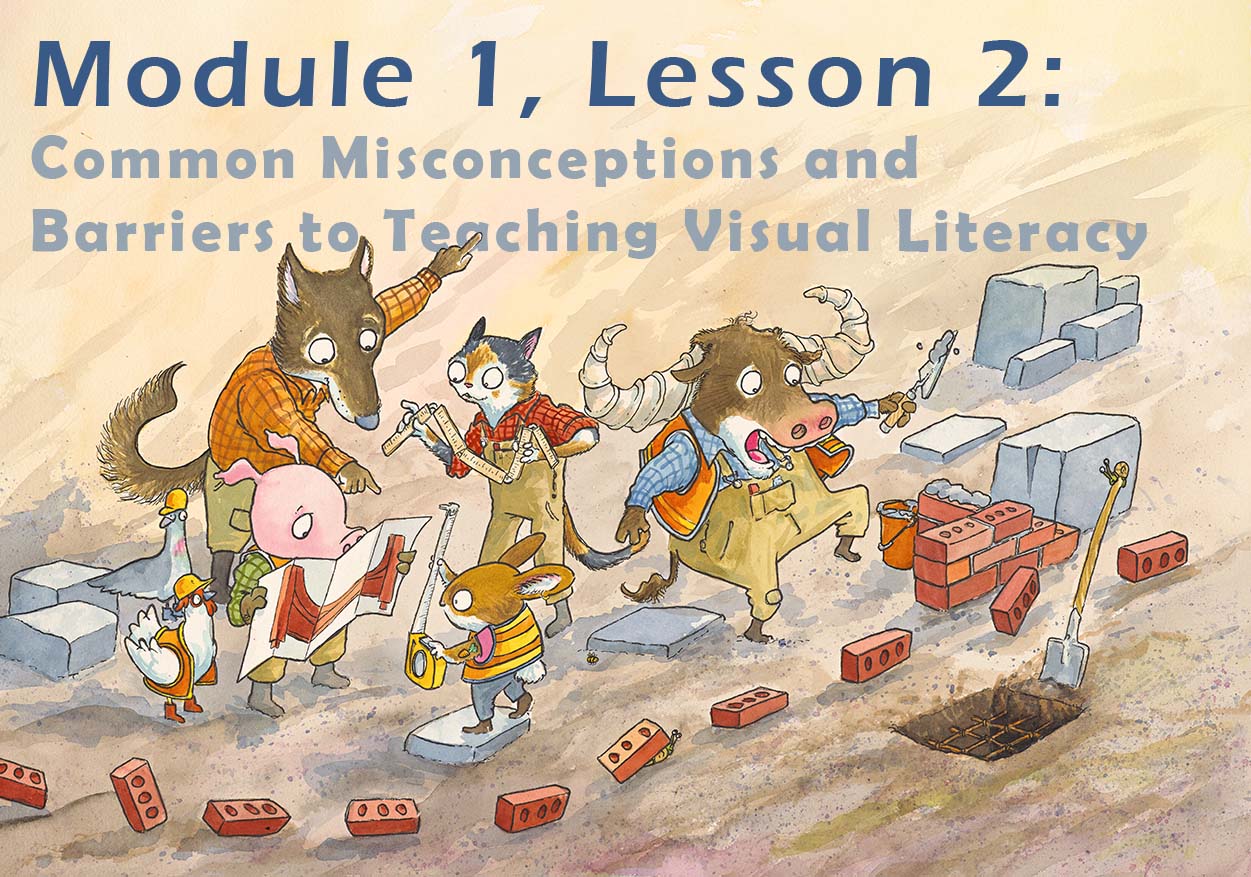
Up Next: Module 1, Lesson 2
Common Misconceptions and Barriers to Teaching Visual Literacy
In the next lesson, we’ll explore the doubts and challenges teachers face and how to overcome them with confidence.
Standards Source
This lesson aligns with the Australian Professional Standards for Teachers, published by the Australian Institute for Teaching and School Leadership (AITSL), 2011 (Revised 2018).
You, Me, Community (2026) Zanni Louise and Tony Flowers – Walker Books Australia
Visual literacy is often misunderstood. Many educators hesitate to teach it, believing they lack the artistic ability or that it doesn’t fit into their subject area. This lesson aims to debunk those myths and show how visual literacy can be seamlessly embedded into everyday teaching.
Misconception 1: “I’m not an artist, so I can’t teach visual literacy.”
Clarification:
While visual literacy is about interpreting and creating images. Teachers don’t need to be skilled in drawing, painting, or sculpting. The goal is to guide students in making meaning from visuals, using observation, discussion, and critical thinking. Looking at simple ways to communicate through images.

Classroom Insight:
Even simple visuals like stick figures or basic diagrams can be powerful tools for analysis. The focus is on interpretation, not aesthetics.
Drawing Tip: Level Up Your Stick Figures for Storytelling
The humble stick figure is more than just a quick doodle—it’s a powerful tool for visual storytelling. With just a few tweaks, you can instantly boost its expressiveness and character appeal.
Here’s how to upgrade your stick figures in seconds:
- Start with shape:
Swap the simple line torso for a rectangle or oval. This gives your character a sense of volume and movement.

2. Taper the limbs:
Instead of straight lines, draw arms and legs as tapered shapes—thinner at the ends, thicker near the body. This adds flow and dynamism.
3. Now, play!
Experiment with posture, gesture, and facial expression. These slightly advanced stick figures are the foundation for countless beloved characters.
Inspiration corner:
- Think of Terry Denton’s wildly expressive figures in The Treehouse series or Jeff Kinney’s iconic style in Diary of a Wimpy Kid. Both use simple shapes to create memorable, relatable characters that leap off the page.
Curriculum Links:
- (Year 1): Understand how visual elements create meaning
- (Year 6): Analyse how visual elements contribute to meaning in texts
Misconception 2: “Visual literacy is only for art class.”
Clarification:
Visual literacy is relevant across all subjects. Students encounter visuals in science (diagrams), history (photographs), maths (graphs), and English (illustrated texts). Teaching students to decode these visuals enhances comprehension and critical thinking.
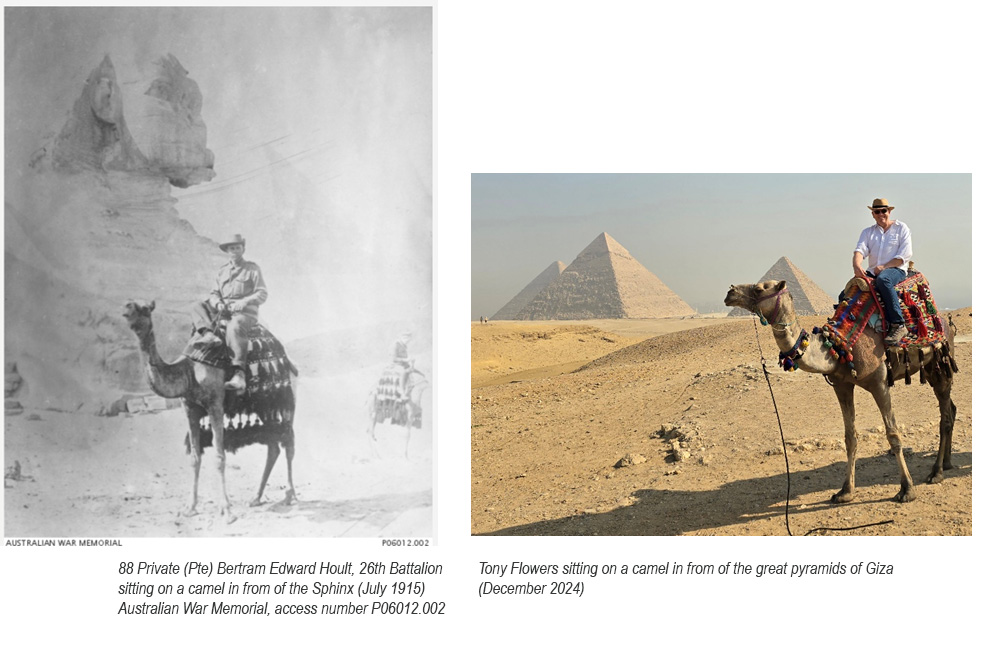
Example: History Then and Now.
Find a historic photograph of a place (for example, the Pyramids of Giza) and then locate a modern photograph taken from the same or similar viewpoint. Compare the two images to identify what has changed and what has stayed the same. Write or sketch your observations to show how people, buildings, or the environment have transformed over time.
Classroom Insight:
Visual literacy supports cross-curricular learning. It helps students interpret data, understand context, and engage with multimodal texts.
Curriculum Links:
- (Year 5 Science): Communicate ideas using representations
- (Year 6 History): Interpret historical sources
Misconception 3: “I don’t have time to add something new.”
Clarification:
Visual literacy doesn’t require additional lessons, it can be integrated into existing ones. For example, analysing an image in a literacy lesson or interpreting a diagram in science enhances the original activity.
Classroom Insight:
Think of visual literacy as an enhancement, not an add-on. It deepens engagement and understanding without increasing workload.
Can AI help?:
A suggested Copilot(or another AI tool) Prompt for use with current lesson plans:
“Can you suggest ways to integrate visual literacy into my [subject/topic] lesson for [year level]? I’m teaching [brief description of the lesson or activity], and I’d like ideas for visual texts, analysis strategies, or simple drawing tasks that support comprehension and engagement.”
Example: “Can you suggest ways to integrate visual literacy into my Year 5 science lesson on ecosystems? I’m teaching food chains and energy flow, and I’d like ideas for visual texts, analysis strategies, or simple drawing tasks that support comprehension and engagement.”
This prompt invites Copilot to:
- Recommend relevant visual texts (e.g. diagrams, comics, infographics, picture books)
- Suggest analysis techniques (e.g. decoding images, comparing visuals to written text)
- Offer drawing-based activities (e.g. sketching food chains, creating visual summaries)
- Align ideas with curriculum goals and student needs
Curriculum Links:
- (Year 6): Analyse and explain how visual elements contribute to meaning
- (Year 7): Plan, rehearse and deliver presentations using visual aids
Misconception 4: “My students won’t get it.”
Clarification:
Students already engage with visuals daily, on social media, in games, and in books. They often understand visual storytelling intuitively. What they need is the language and confidence to articulate what they see.
Classroom Insight:
With the right scaffolding, students can analyse and discuss visuals with enthusiasm and insight. Wordless picture books, comics, and infographics are great starting points.
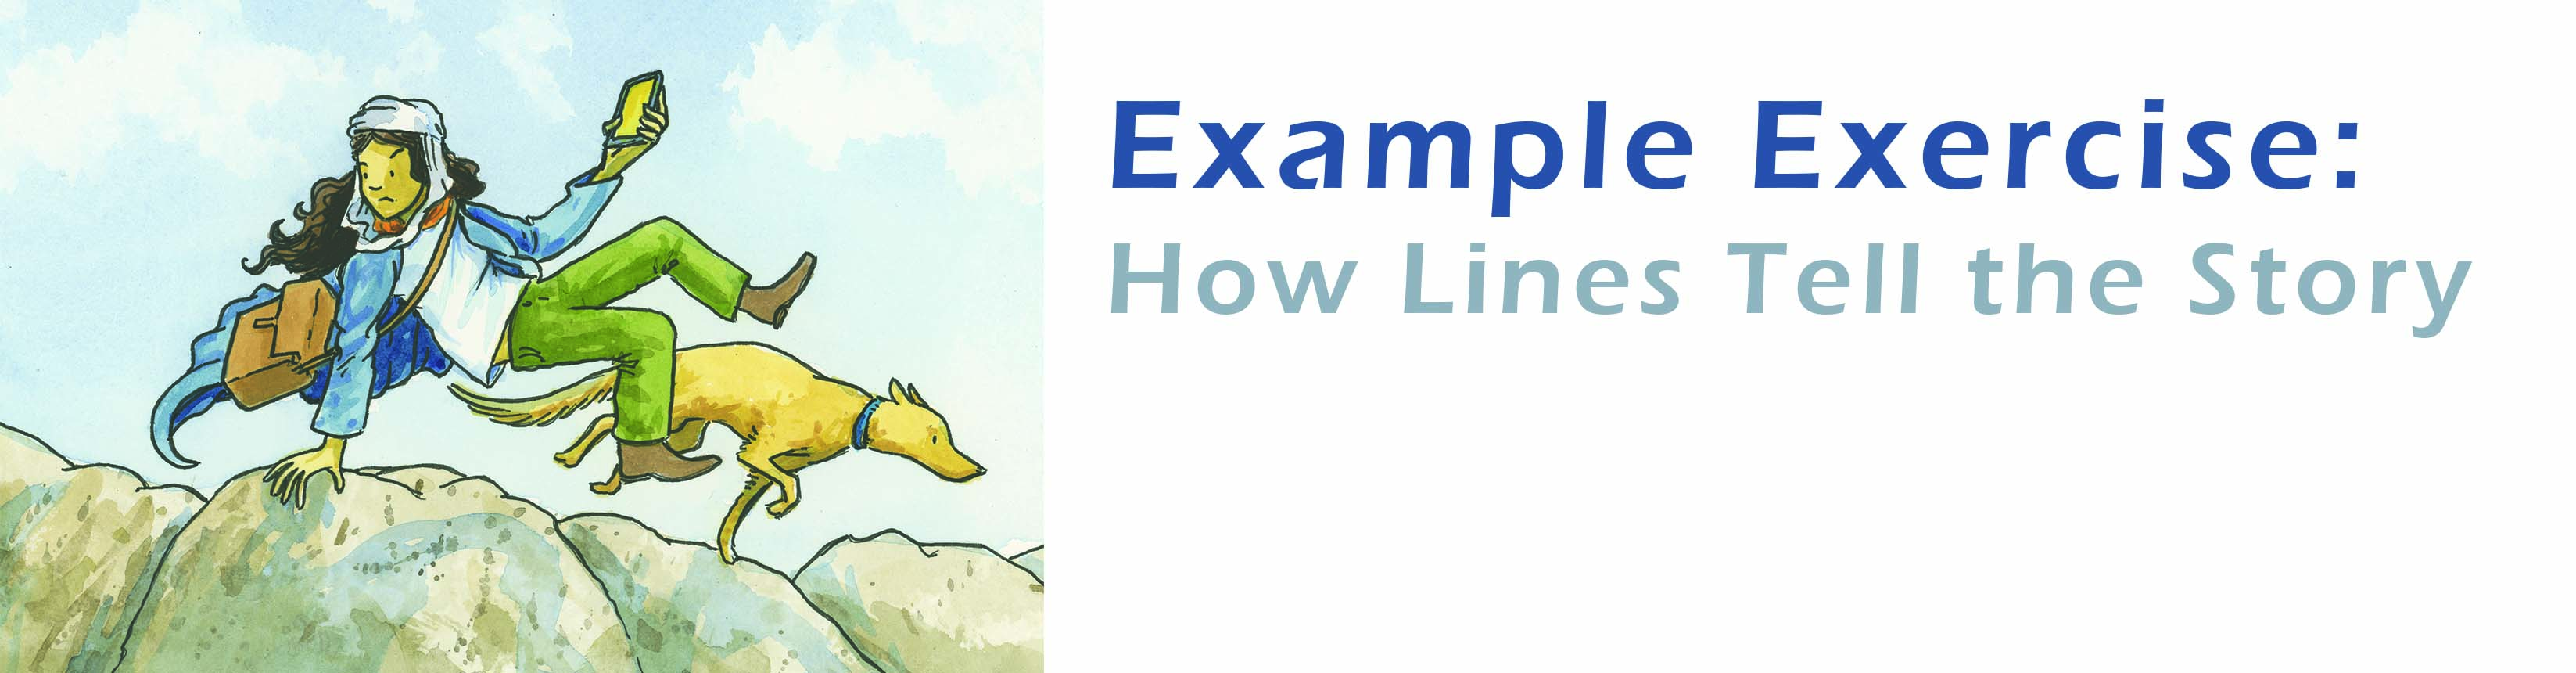
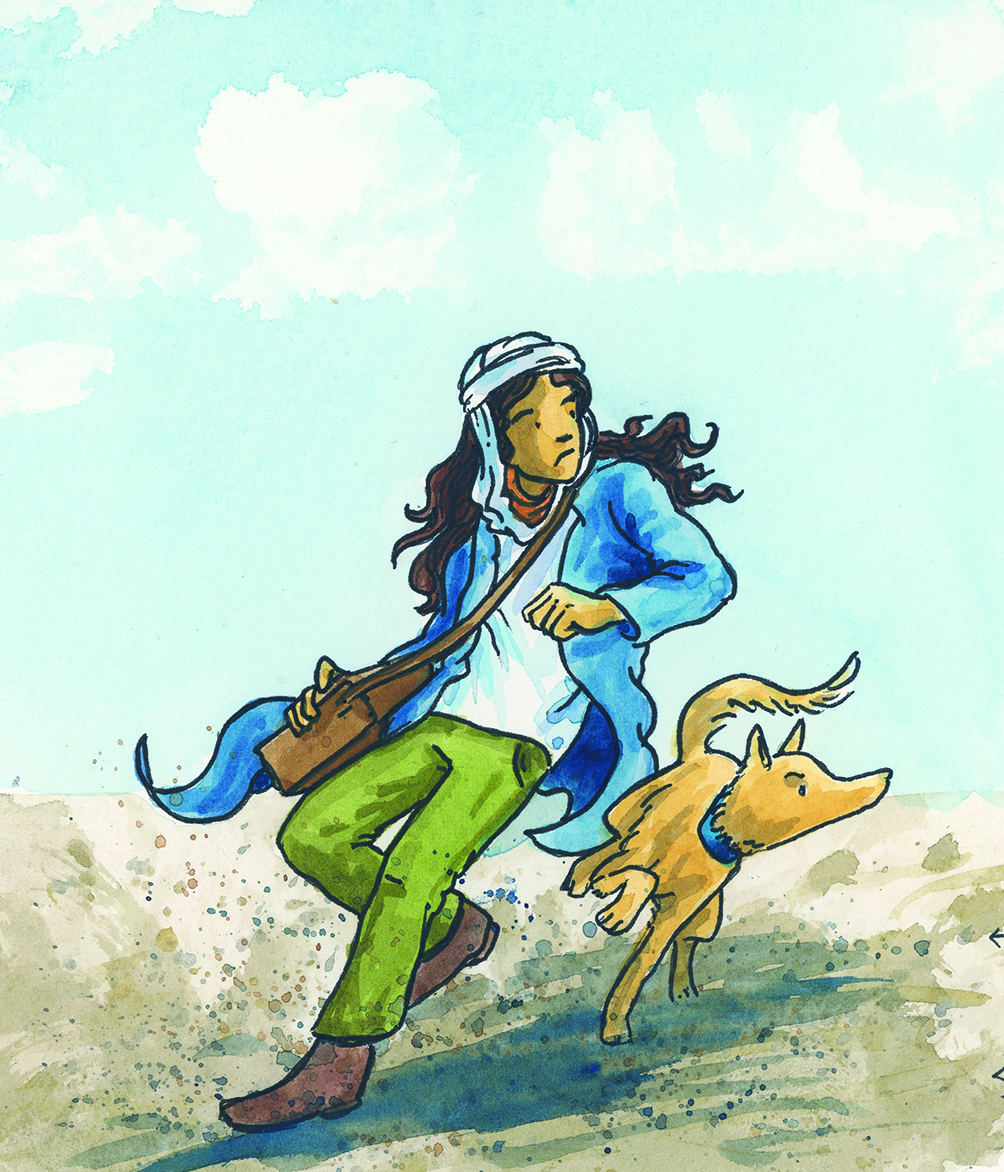
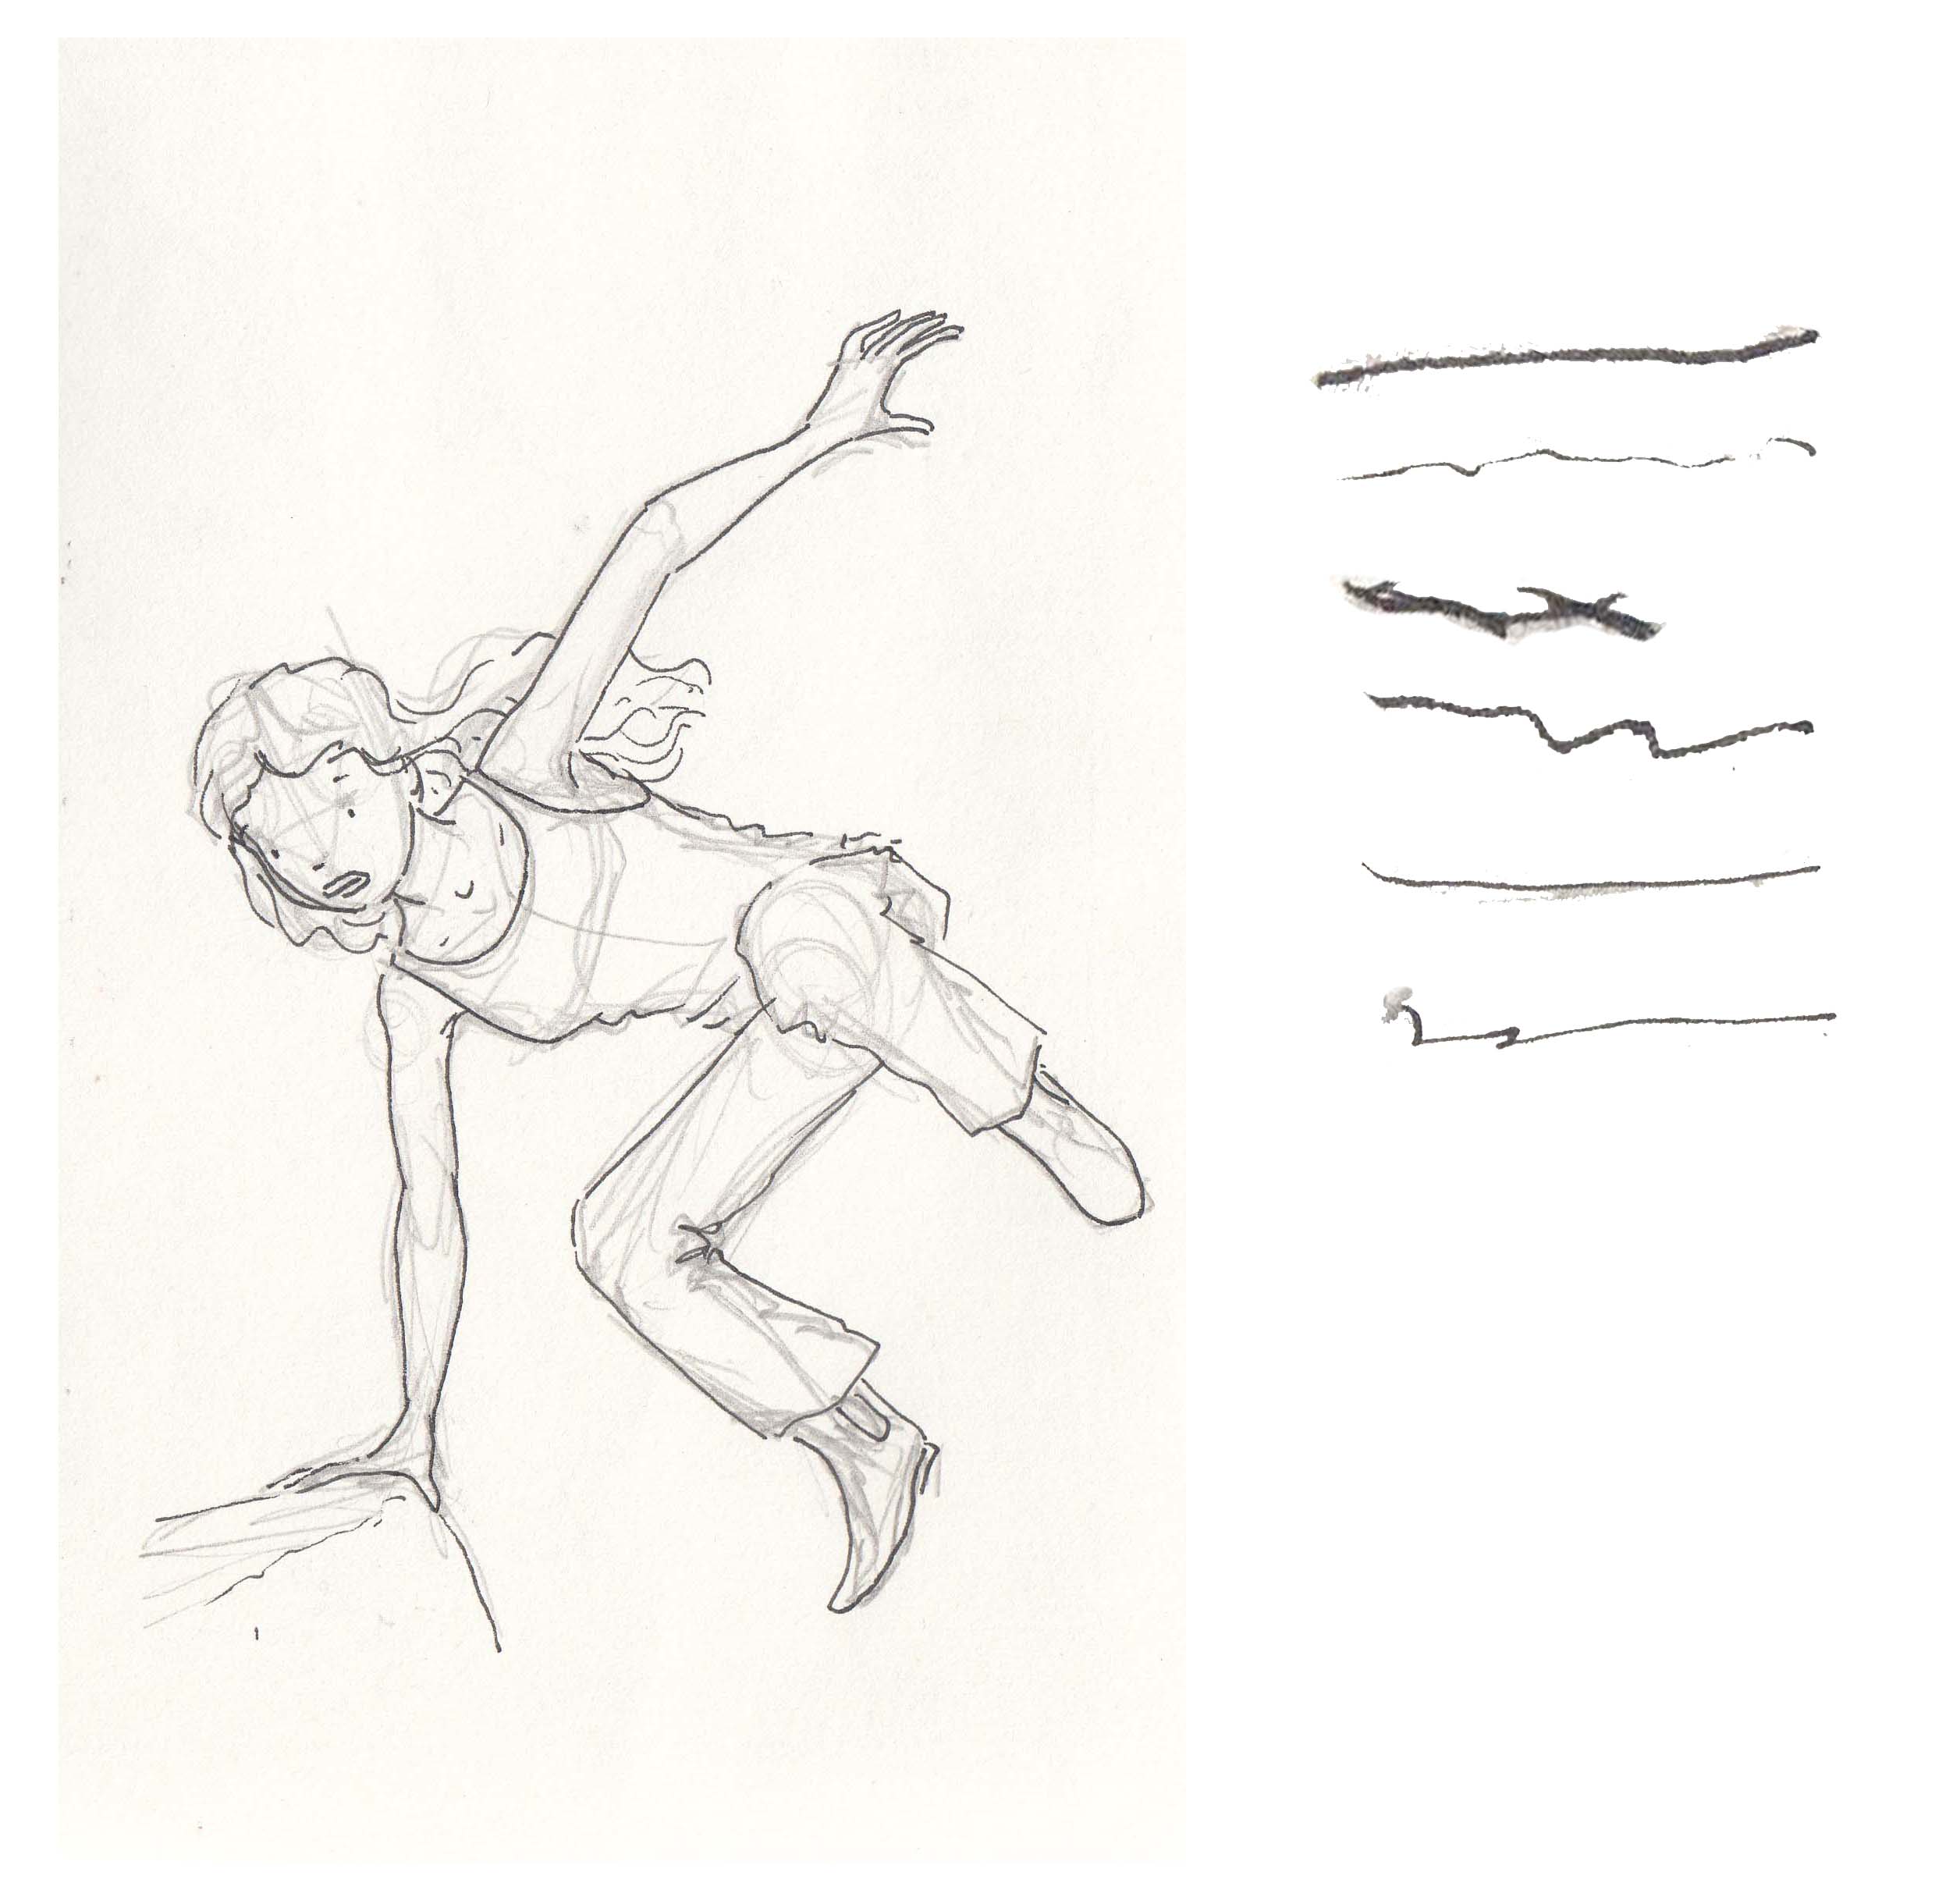
Divi and Frey, the Curse of Anubis (2027) by Tony Flowers, Walker Books Australia
Using the image panel above or find one with similar movement.
Teacher Prompt
“Let’s look at the lines in this image. What do you notice?”
Student Responses
- “The character clothes or bag differ look use different lines.”
- “The dog is pointing forward and the girl is looking backwards.”
- “The character’s hair and clothes have wavy lines.”
Follow-Up Questions
- “How do those lines make you feel?”
→ “It feels like she is rushed and wild, like something bad is behind them.” - “What do you think the illustrator is trying to show?”
→ “Maybe the character is scared or trying to escape.”
Quick Drawing Task
“Now draw a calm version of this scene using different lines. Try curved or soft lines instead of straight ones.”, Stick figures are perfectly acceptable
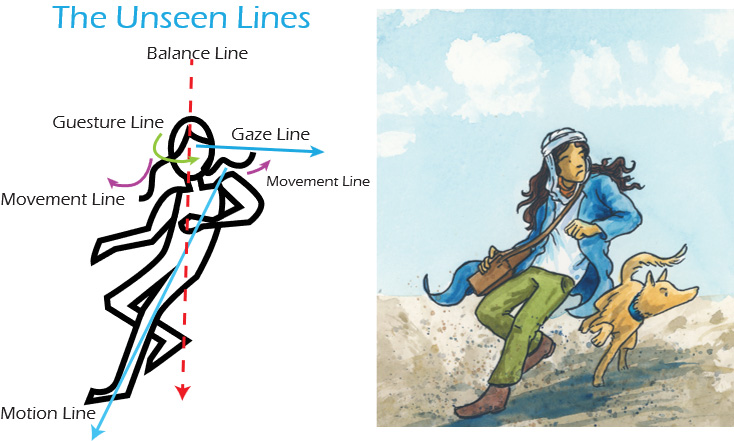
Extension: The Unseen Lines In visual storytelling, unseen lines are the invisible forces that guide the viewer’s eye and shape the narrative flow of an image. These lines, such as motion lines, balance lines, and gaze lines, aren’t physically drawn but are suggested through character positioning, clothing, and surrounding objects to convey movement, focus, and emotional tension.
Try the following prompts with you class;
Prompt 1: Motion Line
“Where do you think the character is moving next? Trace the invisible path their body or clothing suggests, what clues tell you the direction of motion?”
Prompt 2: Balance Line
“If this character were a sculpture, where would their centre of gravity be? Imagine a line running through their body, does the pose feel stable or off-balance, and why?”
Prompt 3: Gaze Line
“Follow the character’s eyes, what are they looking at, and how does that affect the story? Can you find other objects or characters that guide your eye in the same direction?”
******Extension activity read posts on Elements and Principles of Design www.diviandfrey.com ******
Curriculum Links:
- (Year 1): Explore the effect of visual elements
- (Year 7): Analyse and evaluate how visual elements contribute to meaning
The use of ‘Line’ in illustration will be the focus of Lesson 3.
Practical Exercise: Stick Figure Storytelling
Purpose:
To demonstrate that artistic skill is not required to teach visual literacy.
Instructions:
- Choose a short scene from a familiar story (e.g. Little Red Riding Hood or a recent classroom read-aloud).
- Draw the scene using only stick figures, basic shapes, and speech bubbles.
- Label key visual elements such as emotion, action, and setting.
- Share with a colleague or small group and discuss:
- What visual clues helped tell the story?
- What could students learn from analysing this?
Extension Idea:
Use student-created stick figure scenes as a springboard for class discussions on visual storytelling, inference, and multimodal comprehension.
Curriculum Links:
- (Year 6): Analyse visual elements in texts
- (Year 7): Create visual representations to express ideas
Visual literacy is not about artistic ability; it’s about guiding students to interpret and make meaning from visual texts. With the right approach, all teachers can confidently embed visual literacy into their practice.
Key Takeaways
- No artistic skill required:
Teaching visual literacy focuses on interpretation, not illustration. Teachers act as facilitators, helping students decode and discuss visual elements. - Cross-curricular relevance:
Visual literacy applies across all learning areas, including English, Science, HASS, and Mathematics. It supports comprehension and critical thinking in multimodal contexts. - Enhances existing lessons:
Visual literacy strategies can be integrated into current units without adding extra workload. They enrich learning by deepening engagement and understanding. - Students are already visual thinkers:
Learners engage with visuals daily—through books, games, and digital media. With scaffolding, they can develop the language and confidence to articulate what they see.
Curriculum Links
- (Year 3): Understand how visual elements create meaning
- (Year 6): Analyse and explain how visual elements contribute to meaning
- (Year 7): Plan and deliver presentations using visual aids
Teaching Standards Touched On in This Lesson:
| 1.1 | Use teaching strategies responsive to students’ development and backgrounds
| 1.2 | Structure teaching programs using research into how students learn
| 2.1 | Apply content knowledge and teaching strategies to develop engaging learning activities
| 2.5 | Apply effective literacy strategies across learning areas
| 3.1 | Set explicit, challenging learning goals for all students
| 3.2 | Plan well-structured learning programs
| 3.3 | Use teaching strategies that foster critical and creative thinking
| 3.4 | Select and use resources effectively and safely
| 3.5 | Use effective communication strategies to support student engagement
| 3.6 | Evaluate and improve teaching programs
| 4.1 | Support student participation
| 6.2 | Engage in professional learning to improve practice
| 6.3 | Engage with colleagues to improve teaching practice
Learning ActivityPrompt: Reflect on one lesson you’ve taught recently.
How could you include a visual literacy element?
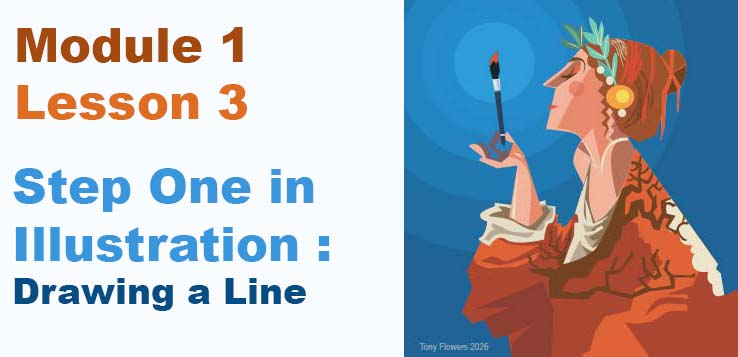
Self-Paced Module Approx. 60 minutes
Audience: Classroom teachers (Years 1–7) and aspiring illustrators
Focus: How lines in illustrations create emotion, movement, and narrative
Introduction: Why Start with Line?
Every image begins with a line. Whether it’s bold and straight or soft and curvy, lines are the first step in building visual meaning. In design and illustration, line is one of the core elements of design, alongside shape, colour, texture, and space. These elements, combined with principles like balance, contrast, and rhythm, help us tell stories through pictures.

While many visual literacy lessons lean heavily on communication theory (how images send messages), these lessons build on design and illustration theory. This is because understanding how images are built gives students and illustrators a stronger foundation for creating their own visual messages. We’ll still reference key thinkers like Molly Bang, Kress & Van Leeuwen, and Bull & Underwood, but our focus is practical: helping you teach or create with confidence.
If you’re an illustrator, this lesson will also help you build technical language to explain your work to publishers or clients. Extension tasks are included to deepen your craft.
Learning Goals
Learning Intentions
- Identify and interpret different types of lines in illustrations
- Explore how line contributes to mood, movement, and storytelling
- Apply design principles to create a visual narrative
Success Criteria
- I can describe how lines are used in an illustration
- I can explain how lines affect the mood and movement of a story
- I can create a drawing that uses lines to express emotion and narrative
Part 1: the not so humble line
When most people think of a ‘line’, they imagine a simple mark, pen to paper, point A to point B. But in illustration, the concept of line is far more layered and expressive. A line can be bold or delicate, straight or chaotic, visible or entirely invisible. It can define a shape, suggest movement, guide the viewer’s eye, or evoke emotion without ever being drawn.
Lines are not just random marks. Each line in an image is a decision made to tell a story. They shape how a character feels, how a scene flows, and how the narrative unfolds visually. In illustration, line takes many forms: the literal stroke of a pencil, the compositional path that leads the eye, or the implied direction of a character’s gaze or motion. Each type plays a unique role in storytelling and design.
Understanding these different kinds of lines, drawn, compositional, and implied is essential for anyone teaching visual literacy or working to master their craft as an illustrator. They’re the foundation of visual language and the key to building images that communicate with clarity, emotion, and intent.
Part 2: Visual Analysis & Discussion
Step 1: Observe
Prompt: “Let’s look at the hidden (or implied) lines in this image. What do you notice?”
Use an image with dynamic movement (e.g. character (Divi) running, hair flying, dog (Frey) turning mid-stride). This exercise can be done with any well illustrated picture books illustration. I would suggest repeating this exercise with a panel from Bob Graham’s How to Heal a Broken Wing (or a similar book).
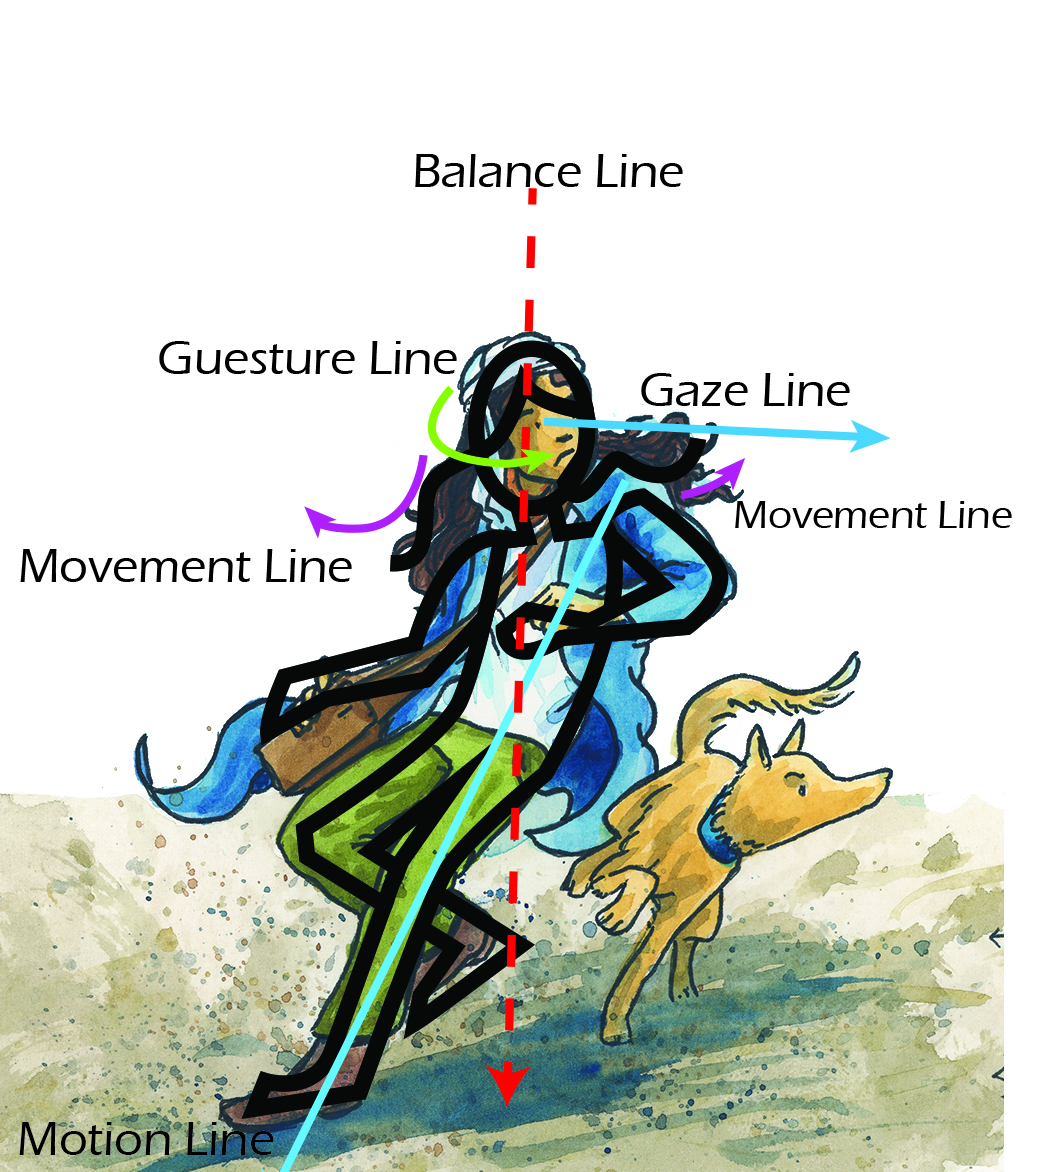
Possible ways to discuss with your students:
“The Gesture Line curves through the person’s body, it makes her look like she’s twisting or turning.”
“The Gaze Line shows she’s looking behind her, even though she’s moving forward.”
“The Motion Line near her legs and the dog’s body shows they’re running fast.”
“The Balance Line goes straight through her body, it looks like she’s leaning but still balanced.”
“The Movement Line in her hair makes it look like the wind is blowing or she’s running.”
Follow-Up Questions to prompt discussion.
- “How do these lines help show what the character is feeling?”
→ i.e, “It feels like she is in a, like someone is chasing them.” - “What do you think is the main thing that the illustrator is trying to show?”
→ i.e, “Maybe the character is scared or trying to escape.”
Design Principles in Focus
- Line: Direction, weight, texture
- Movement: Implied through line and composition
- Emphasis: Where the eye is drawn
- Rhythm: Repetition of line types to create flow
Extension:
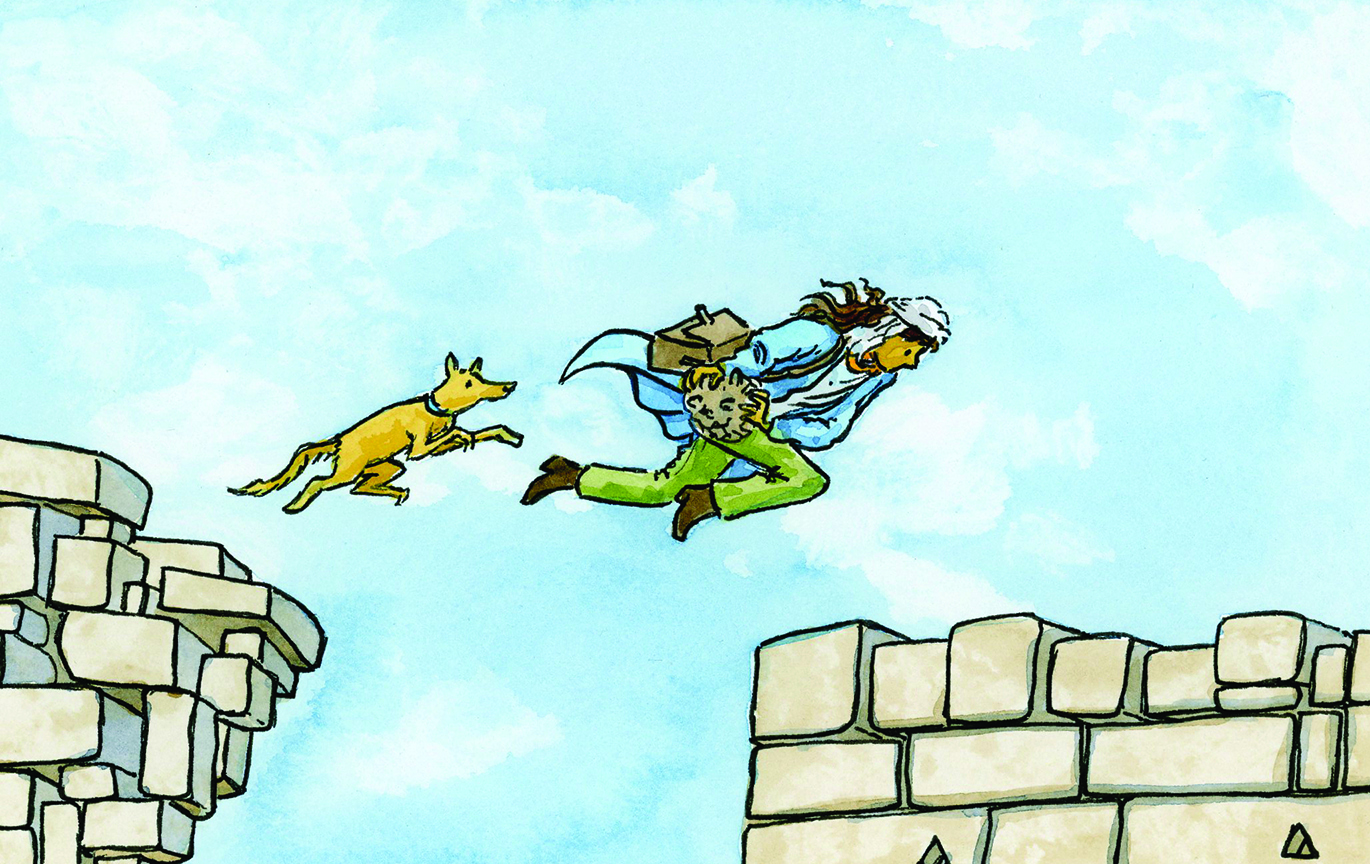
Try an apply what we have discussed to the image above.
Now try and name the following implied lines and list what they are adding to the story:
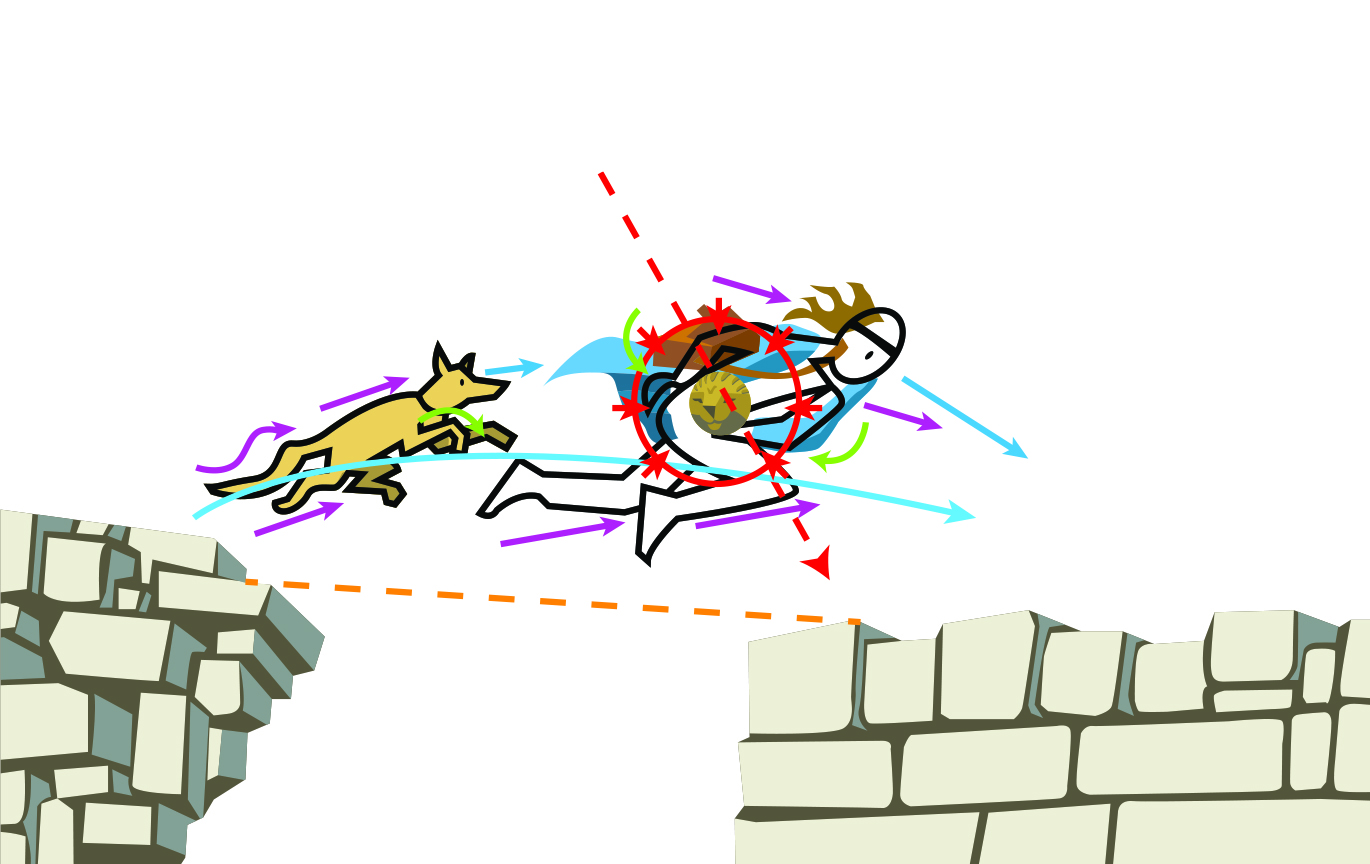
Tip refer to the first image as the arrows are colour coded to the type of line in use.
Part 3: Quick Drawing Task
Prompt: Now draw a character in a scene, play with different unseen lines. An add an intentional gaze for your character and use the balance line to determine where the bulk of the characters body weight will go.
- Stick figures are fine
- Use soft, looping, or horizontal lines to convey calm, jagged and diagonal lines to add action.
- Try and make the character move, run, jump, walk, climb, reach…etc.
Part 3: Exploring Mark Quality Across Materials
Line is one of the most expressive tools in an illustrator’s kit. Its width, profile and texture can communicate emotion, movement, weight and intent. Understanding how different materials behave is key to developing control and fluency in mark-making.
Pens and fine liners: offer consistent, clean lines with minimal variation in width. They are great for precision work, cross-hatching and contour drawing. A perfect tool for the classroom as they so accessible. That said, their uniformity can limit expressive range. To avoid this, look at using different weight pens (i.e. 0.1,0.2,.0.5 or 1mm) in the one drawing or draw on both the tip and the side of the nib.
Dip pens and ink: these are messy but rewarding drawing tools. Sometimes difficult to handle, but if you embraced the potential for chaos you will introduce a dynamic line profile. Pressure and angle affect flow, allowing for dramatic shifts from hairline to bold strokes. The tactile feedback and occasional unpredictability of ink flow creates interesting and lively character and adds spontaneity to the work. Blotting, feathering and pooling can be embraced as part of the aesthetic.
Brush and paint: (especially watercolour or gouache) provide the widest variation in line quality. A single stroke can shift from transparent to opaque, fine to broad, depending on brush type, pigment load and surface texture. These marks often carry a sense of gesture and rhythm, making them ideal for expressive illustration.
Digital tools: simulate all of the above, but with added control. Pressure-sensitive styluses can mimic brush or pen behaviour, and custom brushes allow for endless experimentation. However, digital lines can sometimes feel sterile unless intentionally textured or layered. Studying analogue mark-making helps inform digital technique and keeps the work grounded.
Encourage your students to explore each medium’s limitations and strengths. Ask: How does the material influence the energy of the line? What does the mark say about the illustrator’s intent? By comparing materials side-by-side, students begin to see that line is not just a boundary—it brings its own voice to add to the narrative.
3 Line based classroom activities:
These three activities are designed to help students explore the expressive power of line through age-appropriate, hands-on experiences. Each task encourages students to experiment and reflection on how different materials shape the quality and intent of a mark. These exercises are just examples of how you might teach your students about the use of lines to your class. Feel free to try, adapt and extend of these based on your own students needs, hopefully your students will build a deeper understanding of line as both a technical and emotional tool.
Grade 4: “Material Match-Up” Mark-Making Challenge
Focus: Comparing mark quality across materials
Materials: Fine liners, dip pens, brushes, paint, digital tablet (if available)
Activity:
Ask your students to create four versions of a simple image(e.g., a tree, bird or face). Each images is created using a different material. Now ask the students to annotate each version with observations: Which tool gave the most control? Which felt expressive? Which was messy or unpredictable? Which image do they like the most and why?
Learning Outcome: Encourages analytical thinking and helps students understand how material choice affects visual storytelling.
Grade 8: “Line as Voice” Visual Narrative Panel
Focus: Line variation, intent, and storytelling
Materials: Ink, brush, digital tools, mixed media
Activity:
Ask your students to create a short comic panel (min 3 panels make 12 panels) or visual poem using only black line work, no colour or shading. They must use line width, rhythm, and texture to convey mood, movement, and emotion.
Learning Outcome: Deepens understanding of line as a narrative device and challenges students to make intentional, expressive choices.
Extension Activities (For Illustrators & Advanced Students)
- Visual Timeline: Sequence key scenes from a picture book, noting how line changes across time
- Mood Mapping: Match line types to emotions (e.g. jagged = fear, curved = calm)
- Compare & Contrast: Use two illustrations with different line styles to explore tone and narrative shift
- Illustrator’s Journal: Reflect on how line choices shape your own work—include sketches and notes for future portfolios
Resources & References
- Syllabus Bites: Visual Literacy Overview
- Bob Graham Visual Literacy Lesson Pack
- Molly Bang, Picture This: How Pictures Work
- Kress & Van Leeuwen, Reading Images
- Bull & Underwood, Picture Books and Beyond
HOW TO BOOK SCHOOL VISITS and TALKS
If you’re a teacher and would like me to visit your school to run workshops on visual storytelling, illustration, or writing process, you’re very welcome to get in touch through my speaking agents. I’d love to work with your students and staff.
In Australia:
Lamont Authors
https://www.lamontauthors.com.au/lamont_author/tony-flowers
For International enquiries and events for teacher, contact me directly, tony@flowersink.com.au

Leave a comment